Introduction
Successful running track installation starts with a stable foundation, proper drainage, and suitable surfacing materials. Each layer must be installed correctly to ensure the finished track meets the project’s performance and durability requirements. While these basic requirements apply to most projects, the installation process varies depending on the track system. Spray coat, sandwich, full-polyurethane, and prefabricated tracks use different materials and construction methods. Understanding these differences helps contractors plan their work and avoid problems such as poor adhesion, uneven surfaces, and premature wear.
This guide covers the four main running track systems, their step-by-step installation methods, and the essential quality checks before a completed track is opened for use.
Common Types of Synthetic Running Track Systems
Running track systems vary in their materials, construction methods, and performance. The table below compares four commonly used systems.
Sandwich System
Spray Coat System
Prefabricated System
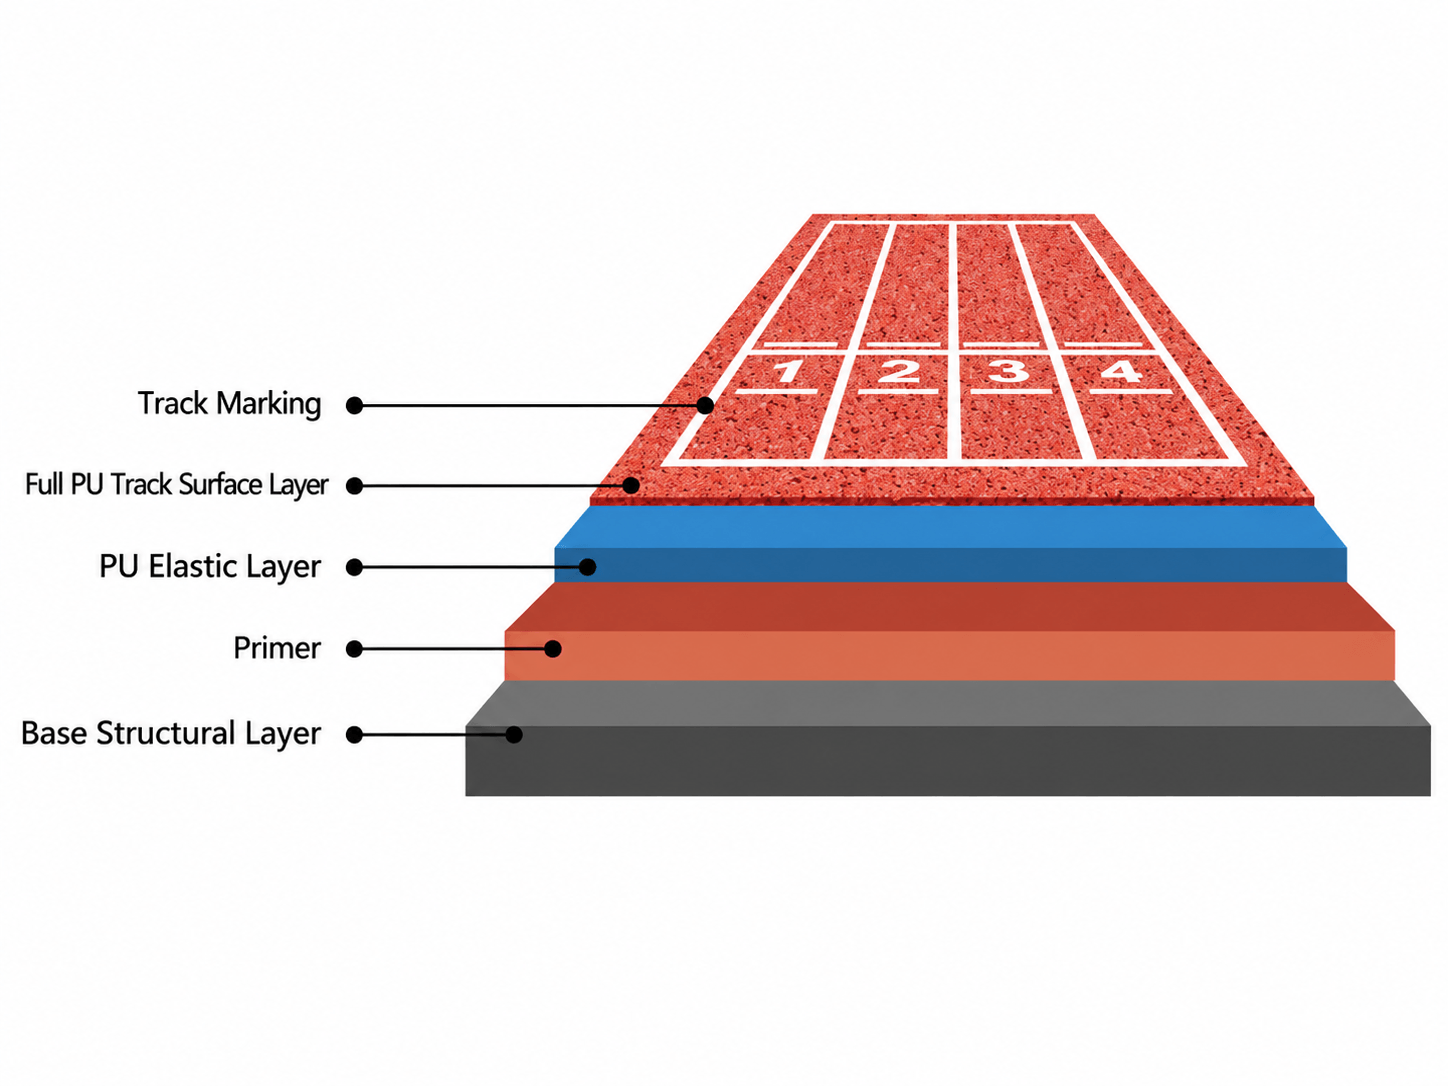
Full Polyurethane System
| Running Track System | Construction | Key Benefits | Typical Applications |
|---|---|---|---|
| Spray Coat System | PU-bound rubber granule base with a spray-applied wearing surface | Water-permeable structure, good drainage, and relatively economical installation | School running tracks, community sports facilities, and training grounds |
| Sandwich System | Rubber granule base, pore-sealing layer, and cast PU wearing surface | Durable, non-porous surface with good wear resistance and a balance between cost and performance | School and university tracks, athletics training centers, and multi-purpose stadiums |
| Full Polyurethane System | Multiple cast PU layers with a textured wearing surface | Dense, seamless construction, high wear resistance, and the ability to tailor surface properties through the PU formulation | Professional athletics stadiums, competition tracks, and high-use training facilities |
| Prefabricated Sheet System | Factory-manufactured rubber sheets bonded to the prepared base | Factory-controlled thickness and surface texture, consistent sheet properties, and less on-site material mixing | Professional competition venues, athletics stadiums, and training facilities requiring consistent surface specifications |
Step-by-Step Running Track Installation Process
Running track installation starts with base preparation. From there, the process differs by system, with rubber granules, poured polyurethane, or prefabricated sheets requiring different installation methods.
Step 1: Inspect and Prepare the Base
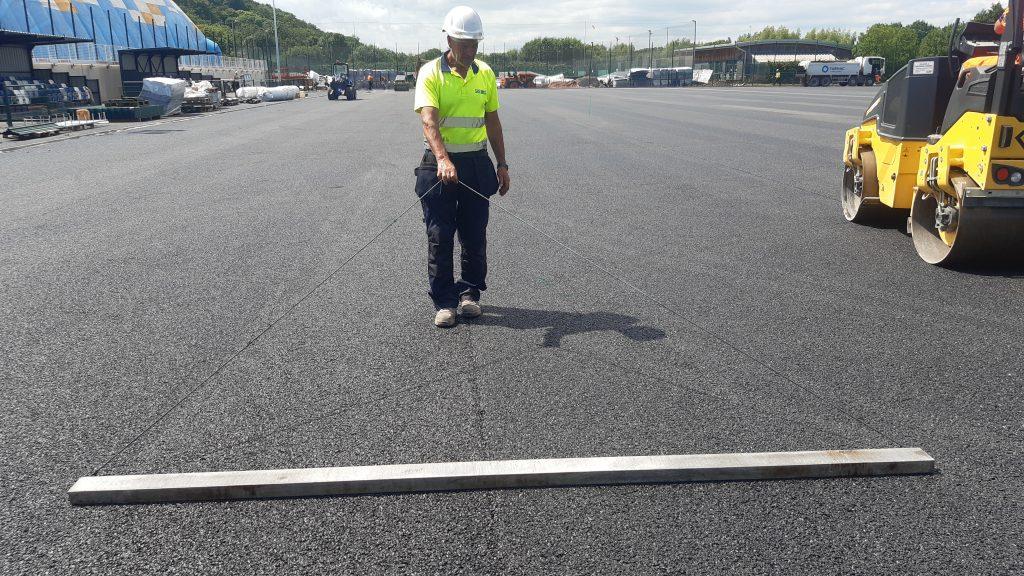
A stable, level, and dry base is essential for running track installation. Before applying the surface layers, check the following conditions.
Surface Flatness and Stability
Use a 3 m straightedge to check surface flatness, with deviations ideally kept within 3 mm where specified by the project. Repair cracks, depressions, and loose areas. Grinding or shot blasting may be needed to remove weak surface material and improve adhesion.
Slope and Drainage
The base should follow the approved drainage design. Some projects specify a transverse slope of 0.5%–0.8%. For competition tracks, World Athletics limits the overall cross slope to 1.0% and the downhill gradient in the running direction to 0.1%.
Substrate Moisture and Curing
New concrete typically requires around 28 days of curing, while asphalt needs sufficient time to stabilize before surfacing. Check that the substrate is dry before applying PU materials. Moisture testing is recommended where required, and a plastic-sheet test can help identify potential moisture problems that may cause bubbling or delamination.
Primer Application
Clean the base thoroughly and apply the specified primer evenly, avoiding missed areas or excessive buildup. Allow it to dry or cure as required before applying the next layer.
Environmental Conditions
For many PU systems, recommended installation conditions are 10°C–35°C with relative humidity at or below 85%, subject to the manufacturer’s specifications. Keep the substrate temperature above the dew point to prevent condensation. Avoid installation during rain or on damp surfaces, and protect spray coating work from strong winds and dust.
Step 2: Install the Main Track Layers
This stage varies significantly according to the running track system. The four installation methods below should be treated as separate procedures rather than interchangeable steps.
Method A: Spray-Coated Running Track Installation

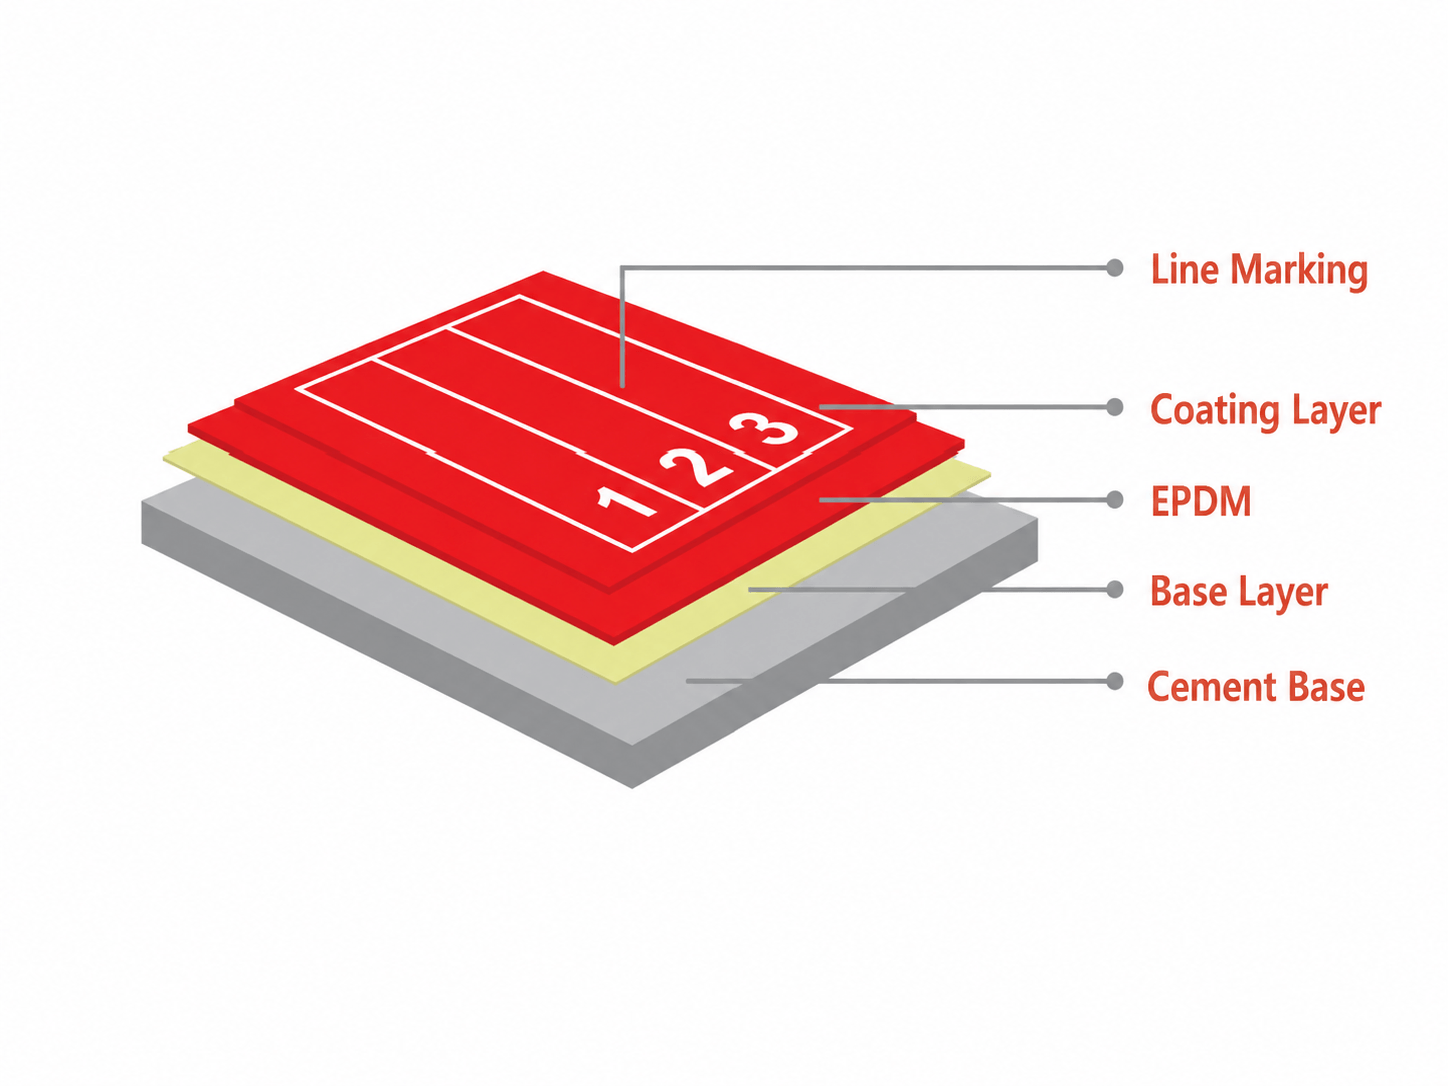
A spray-coated system is a porous, highly breathable structure combining an SBR rubber base with a sprayed polyurethane (PU) and EPDM wearing surface.
1. Mix the Rubber Granules and PU Binder
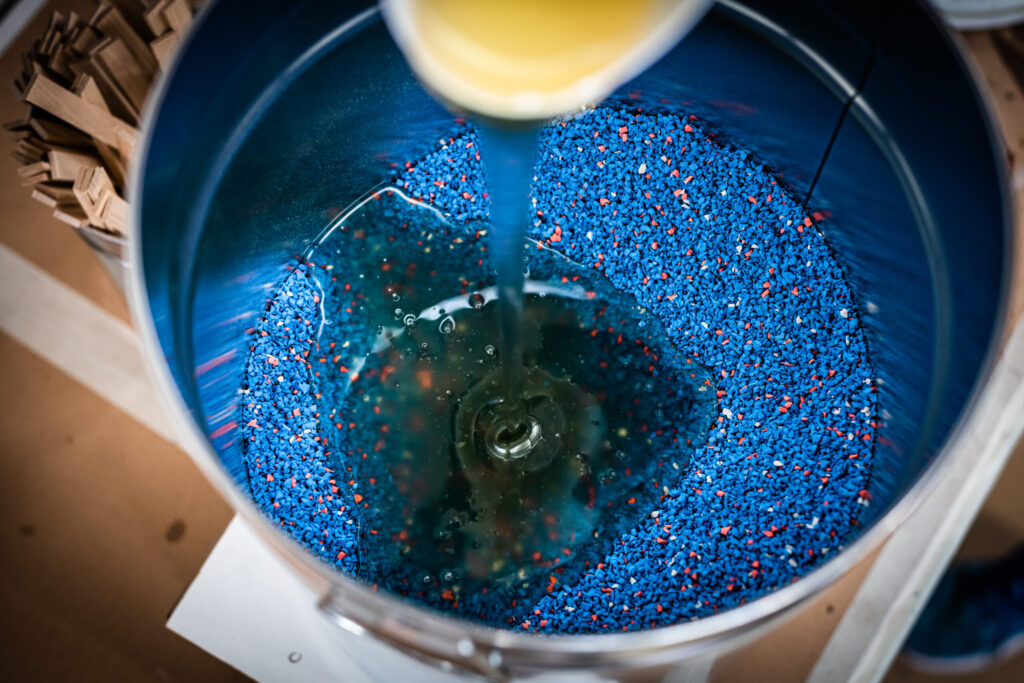
Mix the SBR rubber granules and PU binder thoroughly in a forced-action mixer. The standard weight ratio is typically 6:1. Ensure all granules are evenly coated; insufficient binder or uneven mixing is the primary cause of granule loss (raveling) later on.
2. Pave and Compact the Elastic Base
Spread the mixture using a mechanical paving machine to achieve the designed thickness, generally 8–10 mm. Monitor the surface flatness and joint connections during paving. Avoid over-compacting, as this system relies on its porous structure for fast water drainage.
3. Cure and Inspect the Base
Allow the elastic base to cure completely. Inspect the surface and buff out any raised joints or patch minor depressions before applying the top coat. A smooth, even base ensures a high-quality final appearance.
4. Apply the Spray-Coated Wearing Surface
Spray a mixture of pigmented PU coating and fine EPDM granules over the cured base. This is usually done in two cross-directional passes to ensure uniform color, texture, and a consistent anti-slip finish.
EPDM granule size also affects the final surface texture. For more details, see our EPDM granule size guide, which compares common sizes and their applications.
Method B: Sandwich Running Track Installation
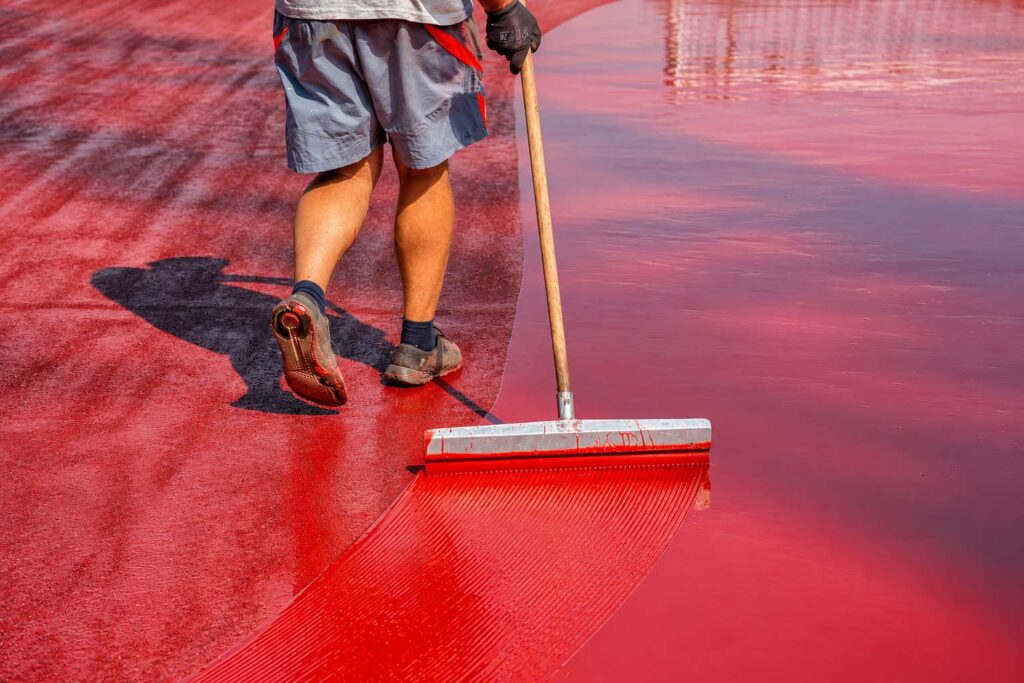
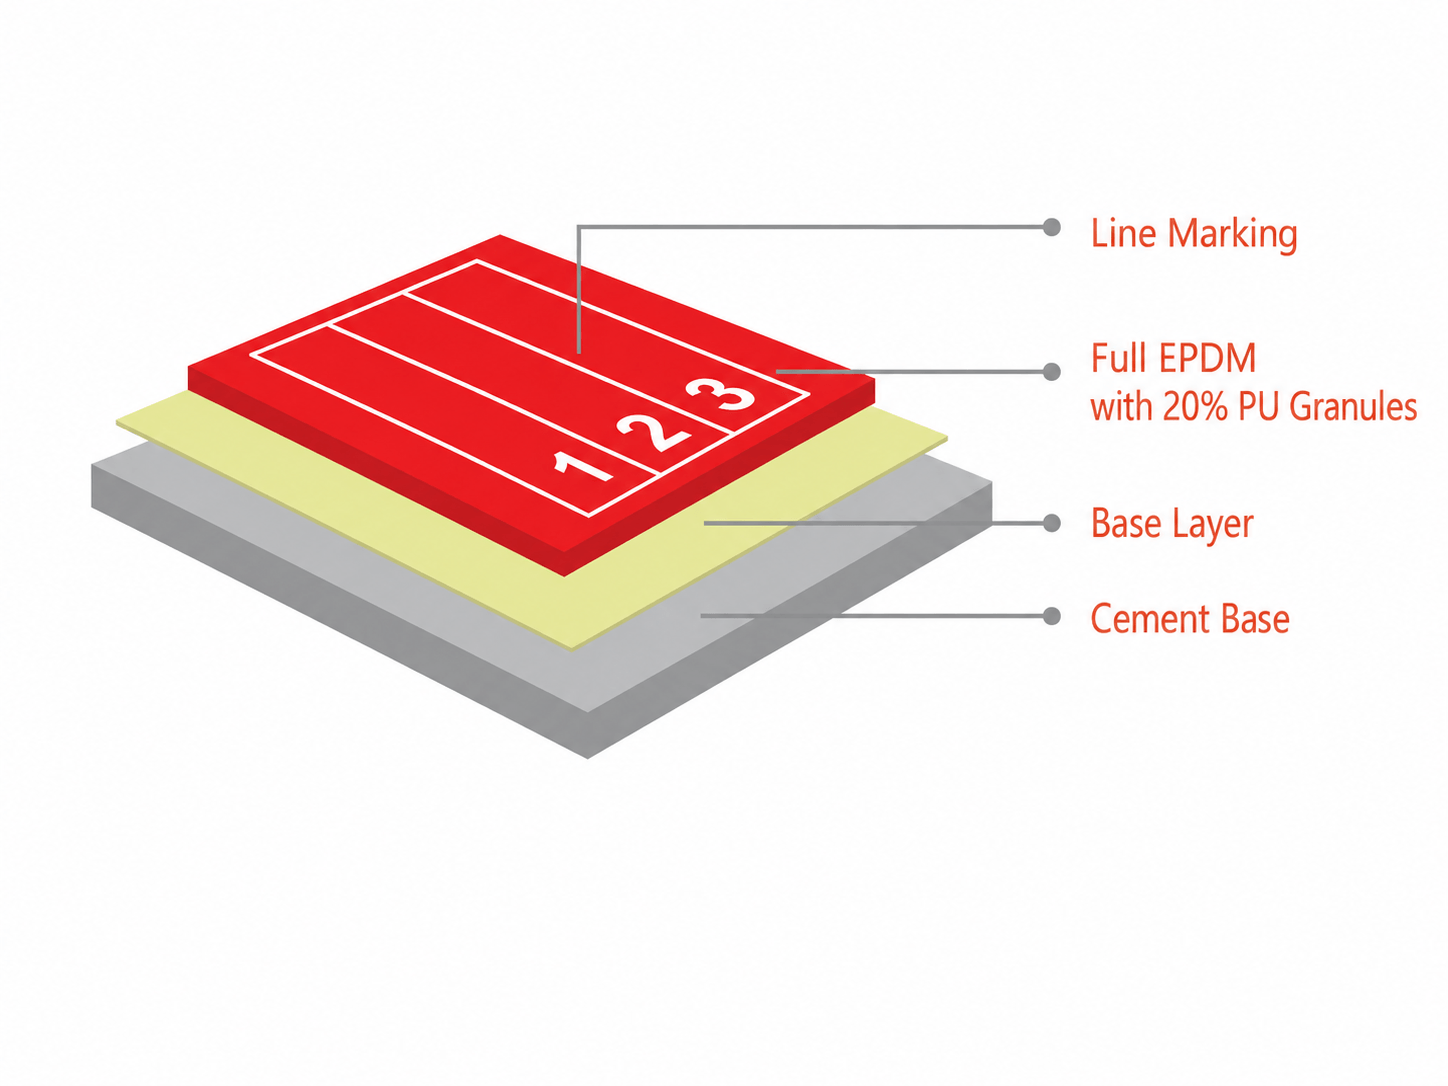
A sandwich system consists of a PU-bound rubber base, a pore-sealing layer, and a cast polyurethane wearing surface. The sealed PU surface provides better wear protection than a conventional spray coat finish.
1. Install the Rubber Base Mat
Mix SBR rubber granules with PU binder and spread the mixture evenly using a paving machine. A typical sandwich system uses a 9 mm rubber base layer. Compact the material to the specified thickness and maintain a level surface, paying particular attention to joints between paving sections.
2. Seal the Rubber Base
Allow the rubber base to cure, then apply a pore sealer to fill the gaps between granules. This prevents liquid polyurethane from soaking into the porous base and helps form a continuous, even wearing layer.
3. Apply the Cast Polyurethane Wearing Layer
Mix the PU components at the specified ratio and spread the material evenly over the sealed base. The World Athletics facilities manual specifies a minimum cast PU layer thickness of 4 mm for the sandwich construction it describes, providing sufficient material for wear resistance and durability. Broadcast EPDM granules onto the uncured PU surface to create a textured, slip-resistant finish.
4. Cure and Finish the Surface
Allow the polyurethane to cure fully before removing loose EPDM granules. Inspect the finished surface for uneven areas, poor adhesion, and exposed patches. Repair any defects before proceeding with line marking.
Method C: Full Polyurethane Running Track Installation
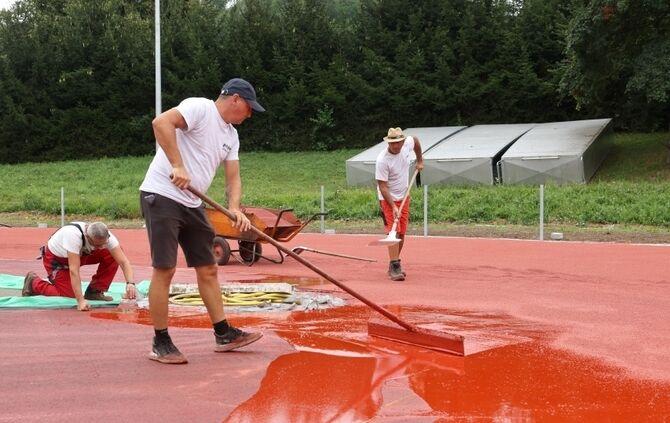
Full polyurethane systems use multiple layers of cast PU to form a dense, non-porous running surface. Unlike rubber-granule base systems, the main elastic structure is formed by polyurethane.
1. Mix the Polyurethane Components
Measure and mix the PU components according to the specified ratio. Ensure thorough mixing to prevent uneven curing, soft spots, or weak areas in the finished surface.
2. Apply the Polyurethane Layers
Pour or spread the mixed PU onto the prepared base, building up the surface in layers to the required thickness. Allow each layer to cure before applying the next, and repair any bubbles, depressions, or uneven areas to maintain a smooth, uniform base for subsequent layers.
3. Create the Wearing Surface
For systems using an EPDM granule finish, broadcast the granules evenly onto the uncured PU surface to create a textured, slip-resistant finish. Once cured, remove loose granules and inspect the surface for uneven coverage or exposed patches. As full-PU surfaces are generally non-porous, ensure the finished track follows the designed drainage slopes.
Method D: Prefabricated Rubber Running Track Installation

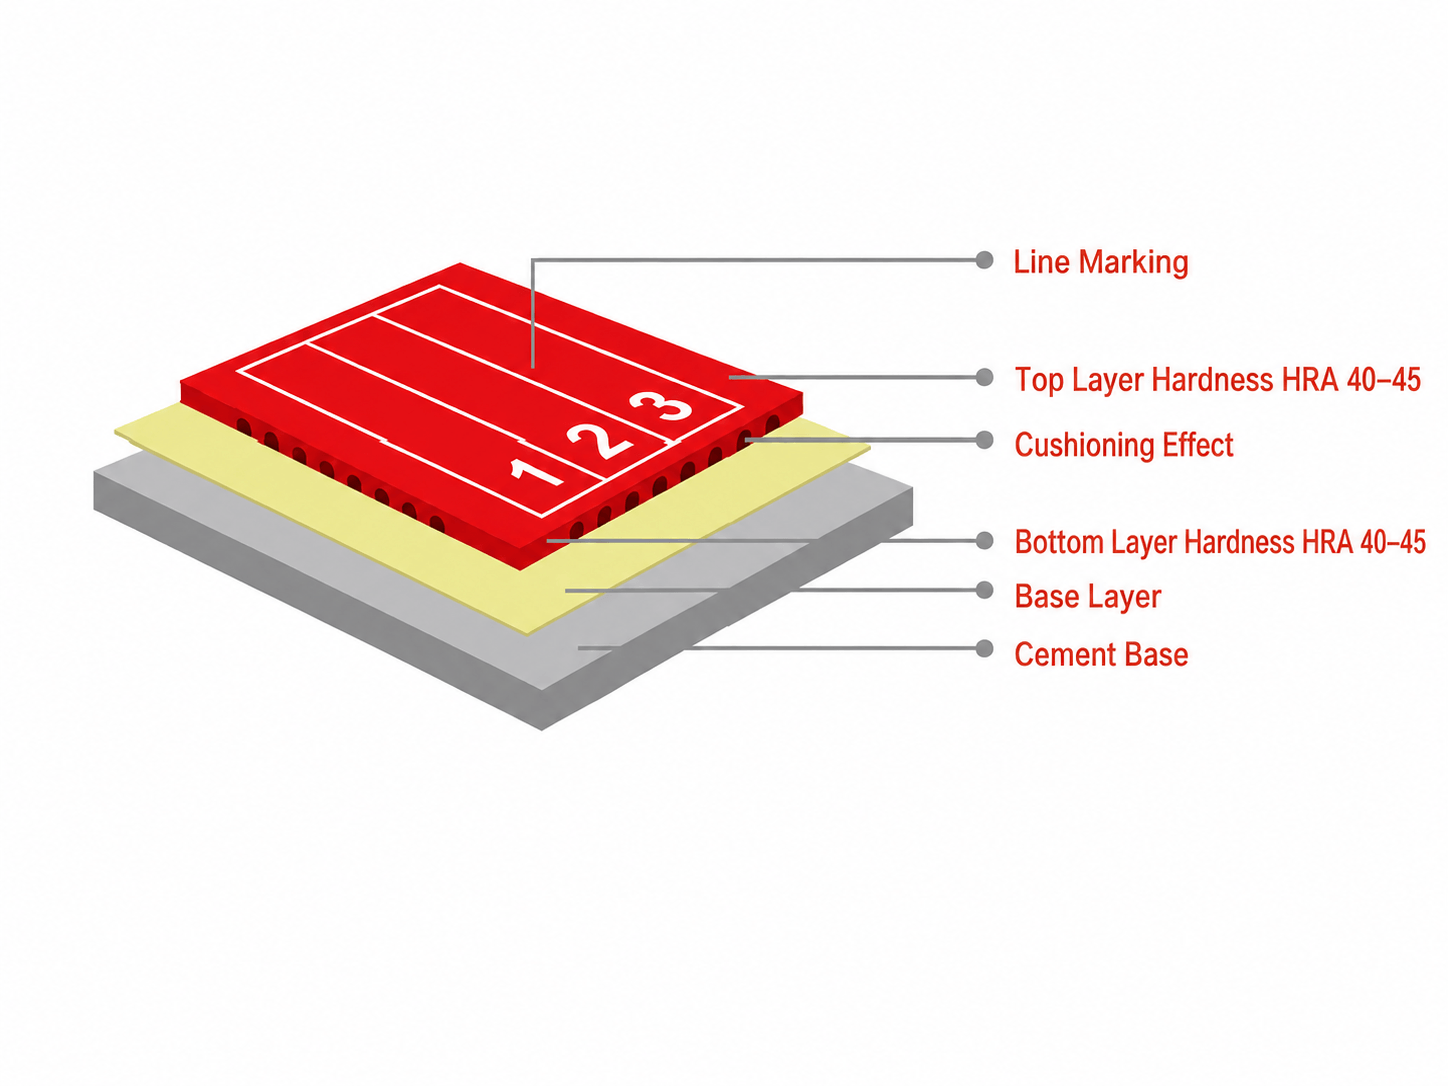
Prefabricated tracks use factory-made rubber sheets bonded to a prepared base. Installation focuses on accurate sheet alignment, even adhesive coverage, and secure seams.
1. Plan the Sheet Layout
Measure the installation area and mark the starting positions, sheet direction, and seam locations. Lay out the sheets before applying adhesive to check alignment and avoid unnecessary cutting or uneven joints.
2. Apply Adhesive and Install the Sheets
Spread the specified adhesive evenly over the prepared base, following the manufacturer’s coverage rate and working time. Position the rubber sheets along the marked lines and press them firmly into place using a roller to remove trapped air and prevent wrinkles or gaps.
3. Finish Seams and Edges
Align and bond adjacent sheets, then roll the seams to ensure firm contact. Check curved sections, perimeter edges, and joints for gaps or raised areas. Allow the adhesive to cure fully before proceeding with line marking.
Step 3: Line Marking and Final Curing

Before line marking begins, the track must be cleared of any debris or loose granules, and any minor surface defects should be addressed. Once the surface is fully prepped, accurately measure and paint the lanes, starting lines, and relay exchange zones according to the approved athletic layout, ensuring the use of paint strictly compatible with the rubber surface. Following this, the facility must remain closed to allow all surfacing materials, adhesives, and paints to complete their required curing periods. After the curing phase, conduct a visual inspection to confirm that all markings are dry and firmly bonded. Finally, prior to the official handover, the completed track should undergo comprehensive performance testing to ensure it fully complies with the project specifications and relevant athletic standards.
For more detailed system structures, material preparation, and installation procedures, explore Rubflo’s running track installation guides, available as downloadable PDFs for different track systems.
International Standards for Synthetic Running Tracks
Completing the installation process is only part of delivering a successful running track. The finished surface must also meet the performance and construction requirements specified for the project.
Running track projects may follow different technical standards depending on their location and requirements. Key references include:
- World Athletics: The Track and Field Facilities Manual provides guidelines for athletics track construction, surface performance, and testing.
- EN 14877: A European standard covering performance requirements for outdoor synthetic sports surfaces, including running tracks.
- ASTM F2157: A standard specifying minimum performance requirements and test methods for synthetic running tracks, particularly relevant to North American projects.
For tracks built to World Athletics requirements, the surface must meet the following performance criteria:
| Performance Property | World Athletics Requirement |
|---|---|
| Shock Absorption | 35%–50% |
| Vertical Deformation | 0.6–2.5 mm |
| Wet-Surface Friction | Dynamic friction coefficient ≥ 0.5 (TRRL ≥ 47) |
Shock absorption and vertical deformation are tested at surface temperatures of 10°C–40°C. Surface thickness also affects these properties. While 13 mm is a common nominal thickness, World Athletics specifies 20 mm in designated high-stress areas, including sections of the high jump, triple jump, pole vault, and javelin runways.
Common Running Track Installation Problems and How to Prevent Them
| Installation Problem | Possible Cause | Prevention |
|---|---|---|
| Surface Bubbling | Trapped moisture, damp substrate, or improper curing | Check substrate moisture and allow sufficient curing time before applying subsequent layers |
| Rubber Granule Loss (Spray Coat / Sandwich) | Insufficient PU binder or uneven mixing | Follow the specified mixing ratio and ensure granules are evenly coated with binder |
| Uneven Surface Thickness | Uneven paving, spreading, or compaction | Check layer thickness regularly and adjust paving equipment as needed |
| Delamination | Dust, moisture, or poor bonding between layers | Clean and dry the substrate, and use primers and adhesives compatible with the system |
| Visible Joints or Seams (Prefabricated) | Misaligned sheets or incomplete seam bonding | Align sheets accurately, apply adhesive evenly, and roll the seams firmly |
| Uneven Surface Texture (Spray Coat / Full PU) | Irregular spray coverage or uneven granule distribution | Apply spray coatings in overlapping passes or distribute surface granules evenly, according to the system |
Conclusion
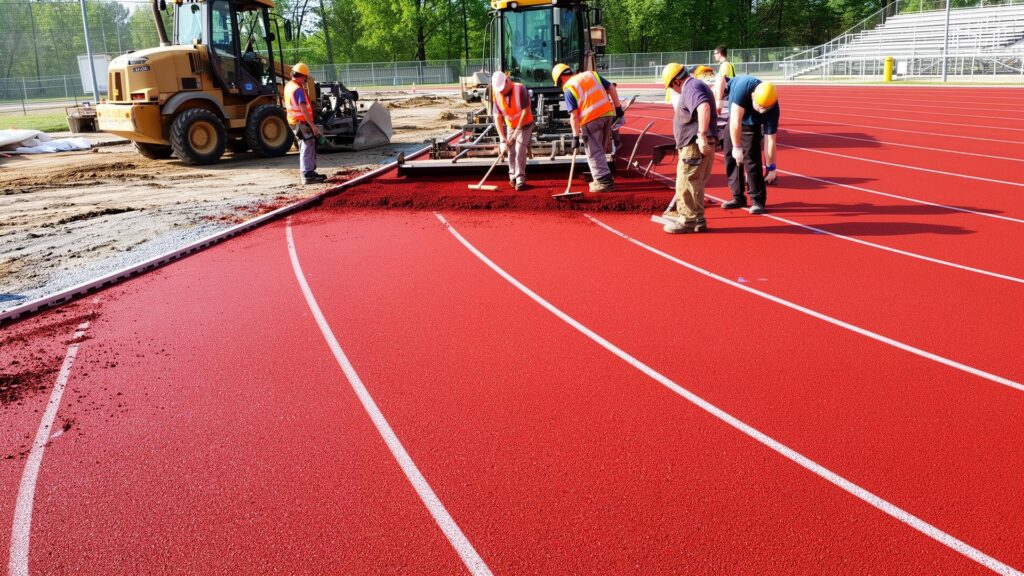
Running track installation requires different techniques for spray coat, sandwich, full-PU, and prefabricated systems. Beyond following the correct construction steps, contractors also need to select materials that match the required layer structure, thickness, and surface performance.
Rubflo works with sports flooring contractors to make that process easier. We supply EPDM and SBR rubber granules, PU binders, and related surfacing materials, with support for material selection, system matching, technical documentation, and installation guidance.
If you’re planning a running track project, share your project requirements with our team. We can help review suitable materials, discuss specifications and quantities, and prepare a quotation for your project.
Frequently Asked Questions
Resurfacing an existing track with a sound foundation typically takes 2–4 weeks, while new running track construction generally requires 8–14 weeks or longer, including base construction, drainage, surfacing, and line marking. Rain, foundation repairs, and material curing periods can extend the schedule.
Yes. Both concrete and asphalt can serve as foundations for synthetic running tracks. Concrete must be fully cured, dry, and free from cracks or weak surface layers. Asphalt must be stable, properly compacted, and sufficiently cured before surfacing. Both require suitable drainage and a primer or bonding system compatible with the selected track materials.
13 mm is a common nominal thickness for synthetic running tracks. A typical sandwich construction, for example, combines a 9 mm rubber base with a 4 mm cast PU layer. The final thickness depends on the system and performance requirements. World Athletics also specifies 20 mm surfacing in designated high-stress areas and 25 mm at the steeplechase water-jump landing.
The main factors are the track area, surface system, material thickness, foundation condition, and labor costs. Resurfacing an existing sound base generally requires less construction work than building a new track with drainage and asphalt layers. For an accurate material quotation, provide the track area, selected system, required thickness, and delivery location.